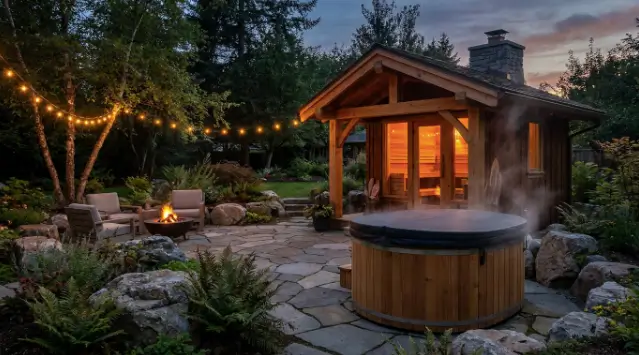
Installing a sauna kit follows a fixed order that most first-time buyers get backwards: confirm the electrical plan and site clearances before pouring any foundation, then build the pad, then assemble the panels, then wire the heater last. Skipping ahead, especially pouring a pad before an electrician confirms circuit routing, is the single most common reason installs stall halfway through. Budget a full weekend for a two-person kit assembled by one reasonably handy person, longer if the electrical run is complicated or the foundation needs to cure before panels go up.
Step 1: Choose and Prep the Site
Start by confirming the kit’s exact interior and exterior dimensions against the physical spot, including at least 3 feet of clearance in front of the door and 2 feet on any side facing a fence or wall. If the kit model is not locked in yet, it is worth comparing footprints and heater specs before committing to a pad location, since pad size has to match the specific model, not a rough estimate. Buyers who have not finalized a choice can browse SweatDecks sauna kits to compare dimensions across sizes before measuring the final site, which avoids the common mistake of pouring a pad sized for one model and then choosing a different one that does not fit it. Confirm the ground slopes away from the structure for drainage, and check for buried utility lines before any digging.
Step 2: Pour or Build the Foundation
Most kits need a base that is level to within about half an inch across the entire footprint. A gravel pad with compacted base and landscape fabric works for many outdoor installs and can be built in an afternoon, while a poured concrete pad takes longer, needs forms, and should cure according to the concrete supplier’s guidance, typically several days before it can bear full weight. Indoor and garage installs often use the existing slab, but check it for level first. Shimming under panel base plates can compensate for very minor unevenness, but more than half an inch out of level should be corrected at the pad stage, not patched later with shims under a finished wall.
Step 3: Plan the Electrical Circuit Before Panels Arrive
This step should happen before, not after, assembly starts. Confirm the heater’s voltage and amperage draw from its spec sheet, then have a licensed electrician assess whether the existing panel has spare capacity for a new 240-volt circuit or whether a subpanel is needed. Running conduit to the eventual heater location while the site is still open ground is far easier than trenching around a finished structure later. Local code in most areas requires a dedicated circuit with its own breaker for heaters above roughly 6 kilowatts, plus a disconnect switch mounted within sight of the heater for outdoor installs. Confirm permit requirements with the local building department, since electrical work often needs a permit even when the wood structure itself does not.
Step 4: Assemble the Wall and Roof Panels
Kit panels are typically numbered and designed to interlock with tongue-and-groove edges, so following the manufacturer’s assembly sequence in order matters more than intuition here. Start with the back wall, work around to the door wall last, and check each panel for plumb before securing it, since an out-of-plumb wall early in the sequence compounds by the time the roof goes on. Roof panels usually go on last and should overlap correctly to shed water on outdoor units. Leave the electrical conduit or knockout access points unobstructed during assembly so the heater wiring step is not fighting finished panels afterward.
Step 5: Wire and Mount the Heater
Mount the heater at the manufacturer’s specified height and distance from benches, then have the electrician make the final circuit connection. This is not a step to improvise even for an otherwise confident DIYer, since incorrect heater wiring is both a fire risk and, in most areas, a code violation if done without a licensed electrician on permitted work. Test the heater’s control panel and timer function before considering the install finished, and confirm the rocks (for models that use them) are seated correctly in the heating element, since improperly stacked rocks restrict airflow and can shorten heating element life.
Step 6: Set Final Clearances and Guard Rails
Install any required heater guard rail at the clearance the manufacturer specifies, commonly 3 to 4 inches from the rail to the nearest bench or wall surface. This rail exists specifically to prevent accidental contact with the heating element and to maintain the airflow clearance the heater needs to function safely, so it is not an optional accessory even on a tight budget. Check door swing clearance one more time with the finished structure in place, confirm the disconnect switch is reachable, and walk the full clearance perimeter to make sure nothing shifted during assembly.
What Tools and Time Should a Buyer Set Aside?
A basic tool kit covers most of the assembly: a drill driver, a rubber mallet for seating tongue-and-groove panels without marring the wood, a level, a stud finder if the kit anchors to an interior wall, and a socket set for the hardware included with most kits. Renting or borrowing a laser level speeds up the foundation check considerably compared to a bubble level alone, especially on a larger pad. For time, a two-person kit with a prepared, level pad usually goes together in a single weekend for one person working alone, or a single day with two people. Larger four- or six-person kits with more panels and a heavier roof structure often stretch to a full weekend even with two people, and that estimate assumes the electrical circuit was already run ahead of time rather than being coordinated on the same weekend as the panel assembly.
What Inspection Steps Should You Not Skip?
If a permit was pulled for the electrical work, schedule the inspection before covering any conduit or closing up access panels. Even without a formal permit, it is worth having the electrician who ran the circuit do a final visual check of the heater connection and breaker sizing before the first use. Run the heater through one full heat cycle without anyone inside to confirm it reaches and holds target temperature, and check for any unusual smell beyond the normal initial off-gassing of new wood, which should fade within the first few sessions.
Frequently Asked Questions
Do I need a permit to install a sauna kit? Many areas require an electrical permit for a dedicated 240-volt circuit even if the structure itself does not need one. Check with the local building department first.
How level does a sauna kit foundation need to be? Most manufacturers specify under half an inch of tolerance across the footprint. More than that can cause panel gaps and binding doors.
Can I wire a sauna heater myself? The circuit run and final connection for heaters above 6 kilowatts should go through a licensed electrician in most areas, both for safety and permit compliance.
How much clearance does a sauna heater need from wood surfaces? Commonly 3 to 4 inches from the guard rail to the nearest bench or wall, per the heater manufacturer’s specification.
References
- Clinical Effects of Regular Dry Sauna Bathing: A Systematic Review, Evidence-Based Complementary and Alternative Medicine, 2018
- Effects of heat and cold on health, with special reference to Finnish sauna bathing, American Journal of Physiology, 2018
- Benefits and risks of sauna bathing, The American Journal of Medicine, 2001
By Nina Castellano